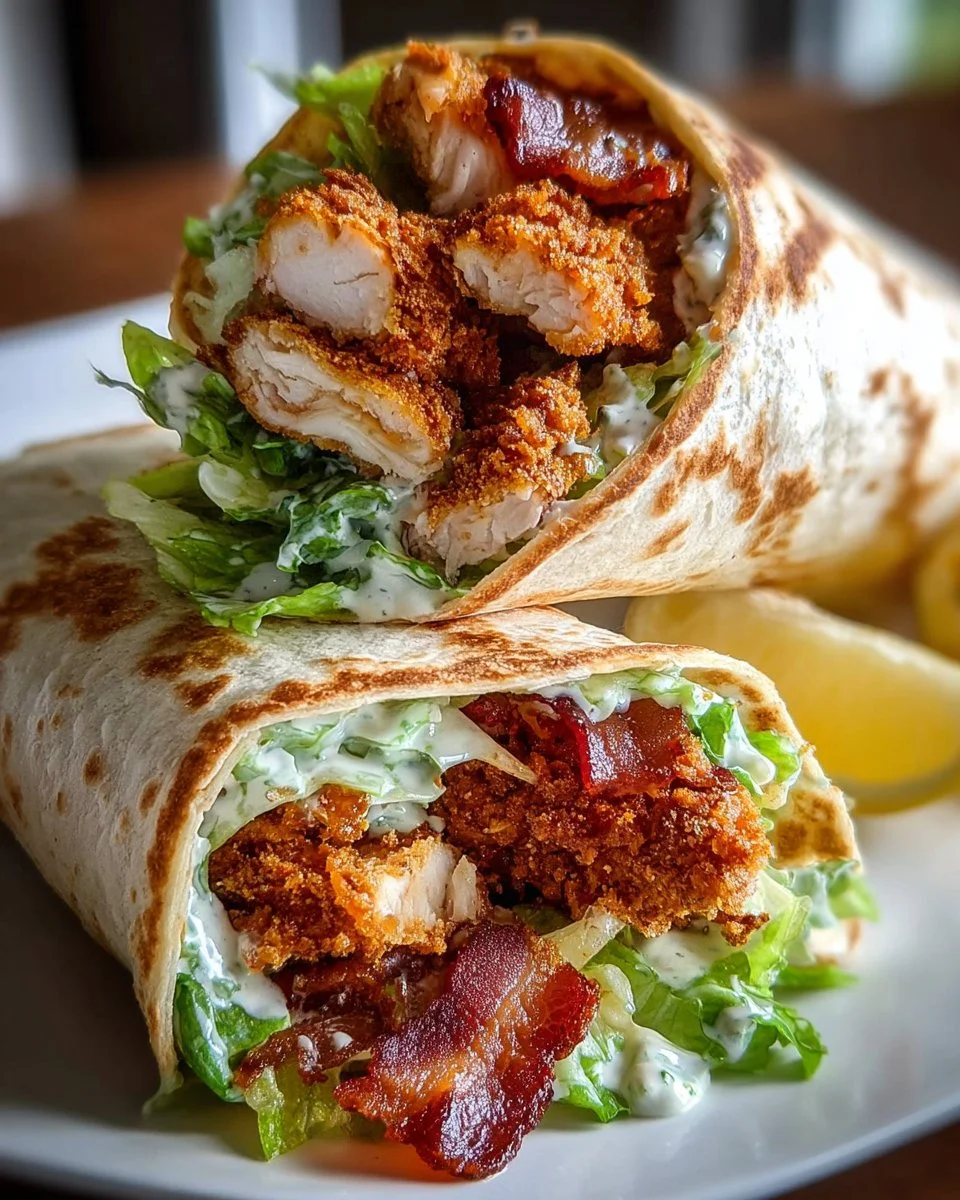
The aroma of sizzling bacon fills the kitchen as you prepare to create a dish that marries comfort with indulgence. Imagine the crispy crunch of beautifully battered chicken that practically sings with flavor, enveloped in a warm flour tortilla. These Crispy Chicken Bacon Caesar Wraps not only tantalize your taste buds but also offer a satisfying texture that bites back, thanks to the delightful contrast of creamy Caesar dressing and the crisp crunch of fresh romaine lettuce. Each bite encapsulates a symphony of flavors, ensuring that your meal becomes a moment of sheer joy.
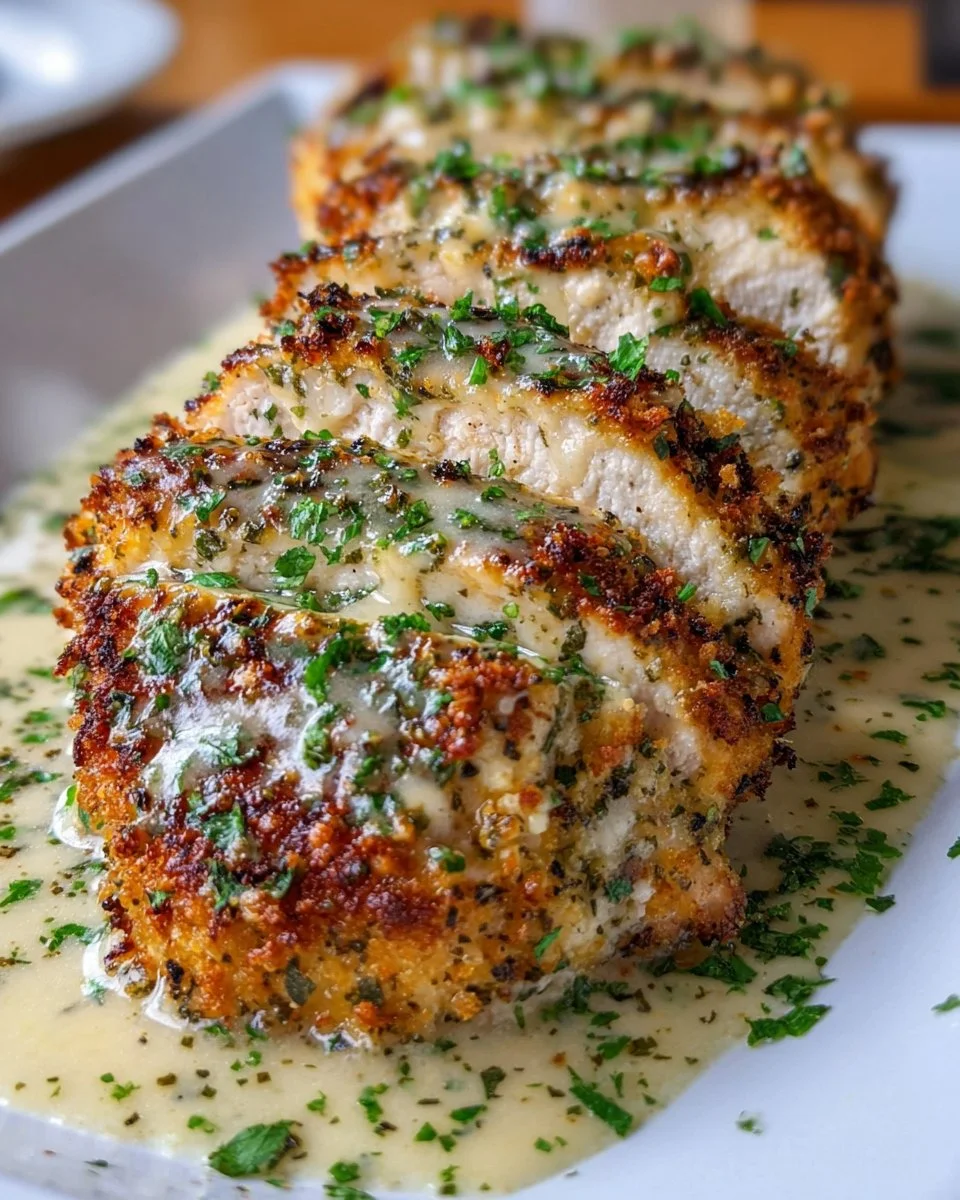
As you savor the first wrap, it’s impossible to ignore the crispy exterior of the chicken thighs, which boasts a golden-brown crust, giving way to juicy, tender chicken within. The rich and salty umami of the bacon perfectly complements the zesty tang of the Caesar dressing, while the lettuce adds that refreshing crunch that balances everything beautifully. A sprinkle of Parmesan provides an elegant finishing touch, elevating this dish to a whole new level. This wrap doesn’t just fill you up; it provides a gratifying experience that makes every bite memorable.
Why You’ll Love This Crispy Chicken Bacon Caesar Wraps
These wraps encapsulate everything we adore about hearty meals: they are vibrant, delicious, and wonderfully versatile. Made with everyday ingredients, they can elevate a mundane weekday dinner into something truly special. The combination of crispy chicken and smoky bacon makes for a robust flavor that appeals to both children and adults, making it a fantastic option for family dinners or casual gatherings with friends.
Not only do these wraps deliver a satisfying crunch with every bite, but they also pack a punch of freshness with the addition of romaine lettuce and tangy Caesar dressing. You can enjoy them freshly made or even meal-prep them ahead of a busy week. The ease of grabbing a delicious wrap from the fridge is incredibly appealing when life gets hectic. This dish shines in its ability to be adaptable—whether served as lunch, dinner, or even a snack, it remains a crowd-pleaser.
Preparation Phase & Tools to Use
Creating these wraps requires just a few essential tools that make the cooking process efficient and enjoyable:
- Large Skillet: A good-quality skillet helps in achieving the perfect golden crust on the chicken thighs while retaining their juiciness.
- Baking Sheet: Using a baking sheet lined with parchment ensures that your chicken finishes cooking crisply in the oven without sticking.
- Mixing Bowls: Having separate bowls for flour, beaten eggs, and panko allows for a seamless dredging process, keeping things neat and organized.
- Tongs: They prove invaluable for handling the hot chicken without any risk of burning your fingers or losing that beautiful crust when transferring to the baking sheet.
Preparation Tips:
- Prepare all your ingredients before starting, so it flows smoothly when you begin cooking.
- Have a meat thermometer handy to ensure the chicken reaches an internal temperature of 165°F.
Ingredients for Crispy Chicken Bacon Caesar Wraps
- 4 boneless, skinless chicken thighs: Tender yet flavorful, thighs provide the juiciness you want in a fried chicken dish.
- 1/2 cup all-purpose flour: This forms the base layer for your crispy coating.
- 2 large eggs, beaten: Acts as the binding agent to help the panko adhere.
- 1 cup panko breadcrumbs: Their coarser texture creates that sought-after crunch.
- 1/2 teaspoon garlic powder and smoked paprika: These spices add depth and aroma, elevating the simple ingredients to gourmet status.
- Salt and black pepper: Essential for seasoning; adjust according to your preference.
- 2 tablespoons olive oil for frying: High heat tolerance ensures a perfect fry without burning.
- 8 slices of bacon: Crispy, smoky, and provides a contrast to the chicken.
- 2 cups romaine lettuce, chopped: Adds freshness and crunch to each bite.
- 1/3 cup Caesar dressing: Use store-bought or homemade for the creamy component that ties everything together.
- 4 large flour tortillas: Soft and perfect for wrapping all the delicious fillings.
- 1/4 cup grated Parmesan cheese: A sprinkle provides saltiness and richness.
- Freshly ground black pepper to taste: Enhances the flavors.
- Lemon wedges for serving: A squeeze brings brightness and enhances all the flavors.
Possible Substitutions:
- Substitute chicken thighs with chicken breasts for a leaner option.
- Use turkey bacon for a healthier twist.
- Swap the flour tortillas for whole grain or gluten-free options for dietary needs.
How to Make Crispy Chicken Bacon Caesar Wraps
Now, let’s dive into the delicious details of crafting these wraps:
- Preheat your oven to 400°F: This step allows the chicken to crisp up perfectly after frying.
- Prepare your baking sheet: Line it with parchment paper to prevent sticking and make cleanup a breeze.
- Set up your dredging stations: In one bowl, pour the flour; in the second, have the beaten eggs ready; and in a third bowl, mix the panko breadcrumbs with garlic powder, smoked paprika, salt, and black pepper until combined.
- Dredge the chicken: Coat each chicken thigh in flour first, ensuring it’s fully covered. Then dip it into the egg mixture, allowing any excess to drip off, and finally, roll it in the seasoned panko until well-coated.
- Heat the olive oil in your skillet over medium-high heat. Once hot, carefully add the coated chicken thighs. Fry for about 2 to 3 minutes on each side until they’re golden brown and divine, then transfer them to the prepared baking sheet.
- Bake in the oven for 15 to 18 minutes until thoroughly cooked and crispy. Let the chicken rest for 5 minutes before slicing.
- Crisp the bacon in the same skillet while the chicken bakes. Fry until desired crispness is reached; then drain on paper towels.
- Assemble your wraps: In a large bowl, toss the chopped romaine with the Caesar dressing until every leaf glistens.
- Warm the tortillas briefly in a dry pan or microwave; this makes them pliable for easy rolling.
- Fill each tortilla: Lay out each tortilla and pile in the Caesar-dressed lettuce, topped with sliced crispy chicken and two slices of bacon. A sprinkle of Parmesan and black pepper offers that final flourish.
- Wrap tightly: Fold in the sides to secure the filling and roll up, making sure it stays snug and packed.
- Slice in half and serve immediately with lemon wedges on the side.
Chef’s Notes & Helpful Tips
- Make-ahead tips: Prepare the chicken and bacon in advance. Store them in the refrigerator and assemble the wraps right before serving for maximum freshness.
- Cooking alternatives: Try using an air fryer for the chicken to achieve a delightful crunch with less oil. Preheat the air fryer to 375°F and cook for around 12-15 minutes, flipping halfway.
- Customization ideas: Feel free to add in other toppings such as roasted red peppers, diced tomatoes, or sliced avocado for a little extra flair and flavor.
Common Mistakes to Avoid
- Overcrowding the skillet: Frying too many chicken thighs at once can lower the oil temperature, resulting in soggy coating. Fry in batches if needed.
- Not letting the chicken rest: Allowing the chicken to rest after baking helps keep it juicy and tender.
- Skipping seasoning: Don’t neglect the seasoning in the panko and on the chicken itself; seasoning enhances flavor and prevents blandness.
What to Serve With Crispy Chicken Bacon Caesar Wraps
Pair these delightful wraps with a variety of sides to create a balanced meal:
- Sweet Potato Fries: Their sweetness complements the savory flavors in the wraps.
- Fresh Fruit Salad: A refreshing and light accompaniment that adds a bright citrusy note.
- Classic Coleslaw: The crunch and creaminess provide a lovely contrast to the wrap.
- Garlic Bread: Adds a decadent touch and heightens the Italian-inspired flavors.
- Potato Chips: For that delightful crunch factor alongside your chicken wraps.
- Caesar Salad: Keep the Caesar theme going with a simple side salad dressed with lemon and Parmesan.
- Grilled Vegetables: Colorful and smoky veggies provide a healthy and delicious contrast.
Storage & Reheating Instructions
Store any leftovers in an airtight container in the fridge for up to 3 days. Leftover wraps can also be frozen—just make sure to tightly wrap each one in foil or plastic wrap before placing them in a freezer-safe bag.
To reheat, thaw in the fridge overnight. You can use an oven to reheat at 350°F for about 10 minutes, or if you’re short on time, a microwave works too—just be careful not to overheat, as that can make the tortilla tough.
Estimated Nutrition Information
Approximate values per serving (1 wrap):
- Calories: 560
- Protein: 34g
- Fat: 30g
- Carbohydrates: 39g
- Fiber: 2g
Note: Nutrition information is an estimate and will vary based on specific ingredients and preparation methods.
FAQs
1. Can I use chicken breasts instead of thighs?
Absolutely! Chicken breasts will work, but they tend to be less tender than thighs. You might want to brine them in saltwater for some extra moisture, or simply avoid overcooking them.
2. Can I make this recipe gluten-free?
Sure! Substitute the all-purpose flour with a gluten-free all-purpose flour mix and use gluten-free panko breadcrumbs.
3. What can I use instead of Caesar dressing?
You can explore other dressings like ranch or blue cheese if you prefer a different flavor profile, or try a yogurt-based dressing for a lighter option.
4. Is this recipe suitable for meal prepping?
Absolutely! The chicken and bacon can be cooked in advance, and the wraps assembled fresh or kept in the fridge for a couple of days for quick lunches.
5. How spicy is this dish?
The dish isn’t spicy; the seasoning adds warmth and depth without heat. If you like things spicy, feel free to add red pepper flakes or a spicier dressing.
Conclusion
Crispy Chicken Bacon Caesar Wraps bring a delightful fusion of flavors and textures that transform mealtime into a blissful experience. With their tantalizing aroma and satisfying crunch, these wraps are not just a meal—they’re a celebration of flavor. Whether you whip them up for a busy weeknight dinner or a special gathering, they promise to impress and delight everyone at the table. Embrace your inner chef, grab those ingredients, and treat yourself and loved ones to this scrumptious dish. You won’t regret it!
Print
Crispy Chicken Bacon Caesar Wraps
- Prep Time: 15 minutes
- Cook Time: 30 minutes
- Total Time: 45 minutes
- Yield: 4 servings 1x
- Category: Main Course
- Method: Baking
- Cuisine: American
- Diet: Omnivore
Description
Indulge in these delightful wraps filled with crispy chicken, smoky bacon, fresh romaine, and creamy Caesar dressing, all wrapped in a warm flour tortilla.
Ingredients
- 4 boneless, skinless chicken thighs
- 1/2 cup all-purpose flour
- 2 large eggs, beaten
- 1 cup panko breadcrumbs
- 1/2 teaspoon garlic powder
- 1/2 teaspoon smoked paprika
- Salt and black pepper to taste
- 2 tablespoons olive oil for frying
- 8 slices of bacon
- 2 cups romaine lettuce, chopped
- 1/3 cup Caesar dressing
- 4 large flour tortillas
- 1/4 cup grated Parmesan cheese
- Freshly ground black pepper to taste
- Lemon wedges for serving
Instructions
- Preheat your oven to 400°F.
- Prepare your baking sheet by lining it with parchment paper.
- Set up your dredging stations: in one bowl, pour the flour; in the second, have the beaten eggs ready; in a third bowl, mix the panko breadcrumbs with garlic powder, smoked paprika, salt, and black pepper until combined.
- Dredge the chicken thighs by coating them in flour, then dip them in egg, and finally roll them in the seasoned panko.
- Heat olive oil in a skillet over medium-high heat. Add the coated chicken thighs and fry for 2-3 minutes on each side until golden brown.
- Transfer the chicken to the prepared baking sheet, then bake for 15-18 minutes until cooked through.
- While the chicken is baking, crisp the bacon in the skillet until desired doneness, then drain on paper towels.
- Assemble the wraps by tossing the romaine with Caesar dressing in a large bowl.
- Warm the tortillas briefly in a pan or microwave.
- Fill each tortilla with Caesar-dressed lettuce, sliced crispy chicken, and bacon. Sprinkle with Parmesan and black pepper.
- Wrap tightly and slice in half. Serve immediately with lemon wedges.
Notes
Make-ahead tips: Prepare chicken and bacon in advance for maximum freshness when serving.
Nutrition
- Serving Size: 1 wrap
- Calories: 560
- Sugar: 2g
- Sodium: 1100mg
- Fat: 30g
- Saturated Fat: 8g
- Unsaturated Fat: 18g
- Trans Fat: 0g
- Carbohydrates: 39g
- Fiber: 2g
- Protein: 34g
- Cholesterol: 90mg