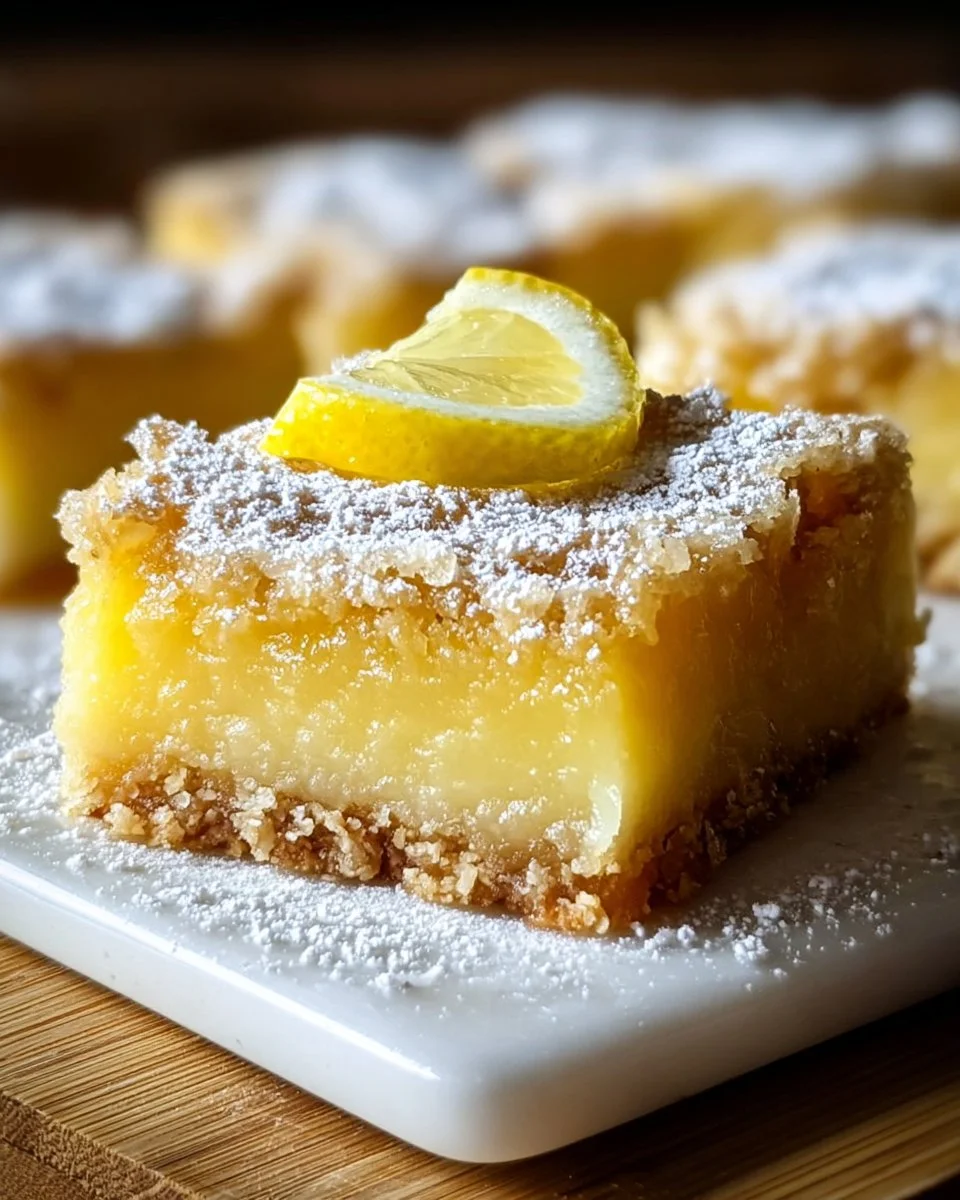
There’s something truly magical about biting into a perfectly crafted lemon bar. A delightful blend of tangy lemon curd sitting atop a buttery, crumbly crust awakens your senses in a whirlwind of flavor and texture. Each square offers a sunshiny burst of zest, where the tartness harmonizes with the sweet undertones, creating a heavenly experience that dances on your palate. The moment you take a bite, you feel the slight crunch of the crust give way to the smooth, velvety lemon filling—a tug-of-war of textures that keeps you reaching for another piece.
Imagine the aroma wafting through your kitchen as the ingredients meld together, filling the air with a scent that’s vibrant and uplifting. Whether you’re enjoying these treats on a sunny afternoon or at a cozy gathering with friends, lemon bars can brighten even the dullest of days. They evoke memories of warm summer days, laughter, and celebration. It’s more than just a dessert; it’s an experience meant to be shared and savored.
Why You’ll Love This Lemon Bar Recipe
These lemon bars are the epitome of balance—sweet yet tart, rich yet refreshing. Their versatility earns them a rightful place at any occasion. Simple enough for a casual afternoon snack yet elegant enough to grace the dessert table at a wedding, they appeal to all age groups and palates.
Imagine serving these bars at your next family gathering or backyard barbecue, where they will surely become the star of the dessert spread. The delight on everyone’s faces as they taste the first bite of the bright, vibrant lemon filling will make you feel like a culinary genius. The combination of honey and lemon creates layers of flavor that intrigue and satisfy. Best of all, they are relatively easy to make, inviting both novice and seasoned bakers to get in the kitchen and whip up a batch.
Preparation Phase & Tools to Use
To create these irresistible lemon bars, you’ll need some essential kitchen tools that make the process smooth and efficient. Here’s what you need:
-
Mixing Bowls: A couple of good-quality mixing bowls are essential. Having different sizes allows for proper mixing and whisking.
-
Whisk: A sturdy whisk is your best friend to blend the ingredients seamlessly and incorporate air into the mixture, ensuring a fluffy texture in your lemon filling.
-
9×9 Inch Baking Dish: This size is perfect for making the ideal thickness in your lemon bars, allowing for the perfect ratio of crust to filling.
-
Spatula: Use a spatula for transferring the batter into your dish and getting every last bit of that luscious filling into your lemon bars.
-
Zester: A microplane or zester is crucial for brightly infusing those aromatic oils from the lemon skin, which elevate the flavor beyond the juice alone.
Practical Preparation Tips:
- Be sure to start with room-temperature butter for easier creaming with the sugar.
- Pre-squeezed lemon juice can save time, but nothing compares to the fresh zest and juice of real lemons—this will enhance the flavor tenfold.
Ingredients for Lemon Bars
- ½ cup (113 grams) unsalted butter: This lends a rich, creamy texture to the crust while providing the base needed to hold the bars together.
- ½ cup (100 grams) granulated sugar: Sweetens the crust and balances the tangy lemon filling.
- 1 cup (92 grams) rolled oats: These add a delightful chewiness to the crust, making it unique and heartier than traditional lemon bars.
- ¼ cup (31 grams) all-purpose flour or whole wheat pastry flour: This ingredient helps bind the crust while contributing to its tender crumb.
- 4 large eggs: Essential for the filling, they provide structure and a soft, creamy mouthfeel that coats your tongue.
- ½ cup (160 grams) honey: This natural sweetener enhances the flavor profile, giving a floral hint that complements the tartness of the lemons.
- 1 tablespoon lemon zest: Full of aromatic oils, it adds a fragrant brightness and depth to the filling.
- ½ cup (120 ml) freshly squeezed lemon juice: The star ingredient that offers the much-loved tang, making each bite invigorating.
- ¼ cup (31 grams) all-purpose flour: This thickens the filling and helps it set properly when baked.
Key Ingredient Notes:
- If you want to reduce sugar, consider using a sugar replacement like agave syrup, but keep in mind that the balance may shift slightly.
- Don’t have enough lemon juice? A mix of lemon and lime juice can give a delightful twist!
How to Make Lemon Bars
-
Preheat the Oven: Start by preheating your oven to 350°F (175°C). This helps ensure that your bars bake evenly and sets perfectly.
-
Cream the Butter and Sugar: In a mixing bowl, combine the unsalted butter and granulated sugar. Use a whisk to cream them together until light and fluffy, which usually takes about 3 minutes. A well-creamed mixture gives the base a lovely airy texture.
-
Mix in the Oats and Flour: Add the rolled oats and your choice of flour to the butter mixture. Stir until well combined, ensuring that the oats are evenly dispersed.
-
Press into the Baking Dish: Coat your 9×9 inch baking dish lightly with butter or non-stick spray. Use clean hands or a spatula to press the crust mixture into the bottom of the dish evenly. Create a slight edge if desired.
-
Bake the Crust: Place the dish in the oven and bake for 15 minutes, just until the crust turns a soft golden brown.
-
Prepare the Lemon Filling: While the crust cools, grab another mixing bowl. Whisk together the eggs, honey, lemon juice, lemon zest, and additional flour until fully incorporated.
-
Pour Over the Crust: Carefully pour the lemon filling over the crust ensuring an even layer.
-
Return to the Oven: Bake again for 20-25 minutes, or until the filling is set and slightly bounces back when gently touched.
-
Cool Completely: Allow the lemon bars to cool to room temperature in the pan before cutting into squares. This waiting period lets the filling firm up nicely.
Chef’s Notes & Helpful Tips
-
Make-Ahead Tips: You can prepare the lemon bars a day ahead of time. Refrigerating them overnight allows the flavors to meld even further.
-
Cooking Alternatives: If you’re looking for a quicker method, consider using an air fryer at 320°F for about the same baking time for both crust and filling.
-
Customization Ideas: Experiment with different citrus like blood oranges or limes for a unique flavor twist—great for adventurous palates!
Common Mistakes to Avoid
-
Undercooking the Filling: Make sure the filling is set before you take it out of the oven. If it’s jiggly, it needs more time.
-
Skipping the Zest: Not using lemon zest means missing on that aromatic pop of flavor, so never skip it!
-
Using Pre-Squeezed Juice: Opt for fresh juice! Bottled substitutions can often lead to a dull flavor in your bars.
What to Serve With Lemon Bars
- Whipped Cream: A dollop of whipped cream adds a creamy contrast that balances the tartness beautifully.
- Fresh Berries: Stack some fresh strawberries or raspberries on top for a touch of sweetness and a color pop.
- Mint Leaves: Garnish with fresh mint for a refreshing note that elevates the entire dessert.
- Iced Tea or Lemonade: Pair these bars with a tall glass of iced tea or lemonade for a thirst-quenching, summery experience.
- Chocolate Sauce: Drizzle with dark chocolate sauce, adding a rich element that complements the lemon’s brightness.
- Ice Cream: Serve atop vanilla ice cream for a luscious dessert experience.
Storage & Reheating Instructions
Store your lemon bars in the refrigerator for up to a week. Ensure you cover them well with plastic wrap or in an airtight container to retain their freshness. For longer storage, consider freezing them. Wrap individual squares tightly in plastic wrap and place in a freezer-safe bag for up to three months. When you’re ready to indulge, thaw them in the refrigerator overnight, then enjoy at room temperature or microwave for a few seconds for a warm treat.
Estimated Nutrition Information
Approximate values per serving (1 square, serves 16):
- Calories: 160
- Protein: 3g
- Fat: 7g
- Carbohydrates: 22g
- Fiber: 1g
(Nutrition information may vary based on ingredient brands and quantities used.)
FAQs
1. Can I use a different type of sweetener?
Absolutely! You can substitute the honey with maple syrup or agave nectar, but keep in mind that it might influence the texture slightly.
2. What happens if my filling doesn’t set?
Your lemon bars might need more time in the oven. If they are still jiggly in the middle, return them to the oven for a few extra minutes until they firm up.
3. Can I make this recipe gluten-free?
Yes, simply replace all-purpose flour with a gluten-free flour blend. Make sure to choose oats labeled gluten-free as well.
4. How do I know when the bars are done?
The bars are done when the edges are lightly golden and the center is set; it shouldn’t wobble like liquid when you gently shake the pan.
5. Can I use bottled lemon juice?
Though it’s possible, freshly squeezed lemon juice will give you a much brighter, more vibrant flavor, which definitely enhances the whole experience of the bars.
Conclusion
Now that you’ve unlocked the secrets to baking these luscious lemon bars, why not gather your loved ones for a sweet treat experience? Slice them up into squares, share them with friends, or enjoy every morsel alone with a warm cup of tea. This recipe stands ready to transport you to sun-drenched days filled with laughter and joy. Roll up your sleeves, embrace the process, and indulge in a moment of pure bliss. Your taste buds will thank you!
Print
Lemon Bars
- Prep Time: 15 minutes
- Cook Time: 35 minutes
- Total Time: 50 minutes
- Yield: 16 servings 1x
- Category: Dessert
- Method: Baking
- Cuisine: American
- Diet: Vegetarian
Description
Deliciously tangy lemon bars with a buttery oat crust, perfect for summertime gatherings.
Ingredients
- ½ cup (113 grams) unsalted butter
- ½ cup (100 grams) granulated sugar
- 1 cup (92 grams) rolled oats
- ¼ cup (31 grams) all-purpose flour or whole wheat pastry flour
- 4 large eggs
- ½ cup (160 grams) honey
- 1 tablespoon lemon zest
- ½ cup (120 ml) freshly squeezed lemon juice
- ¼ cup (31 grams) all-purpose flour
Instructions
- Preheat your oven to 350°F (175°C).
- Cream the unsalted butter and granulated sugar until light and fluffy.
- Mix in the rolled oats and flour until well combined.
- Press the crust mixture into a greased 9×9 inch baking dish.
- Bake for 15 minutes until golden brown.
- Prepare the lemon filling by whisking together eggs, honey, lemon juice, lemon zest, and additional flour.
- Pour the lemon filling over the baked crust.
- Return to the oven and bake for another 20-25 minutes.
- Cool completely before cutting into squares.
Notes
For added flavor, consider experimenting with blood oranges or limes.
Nutrition
- Serving Size: 1 square
- Calories: 160
- Sugar: 10g
- Sodium: 50mg
- Fat: 7g
- Saturated Fat: 4g
- Unsaturated Fat: 3g
- Trans Fat: 0g
- Carbohydrates: 22g
- Fiber: 1g
- Protein: 3g
- Cholesterol: 70mg