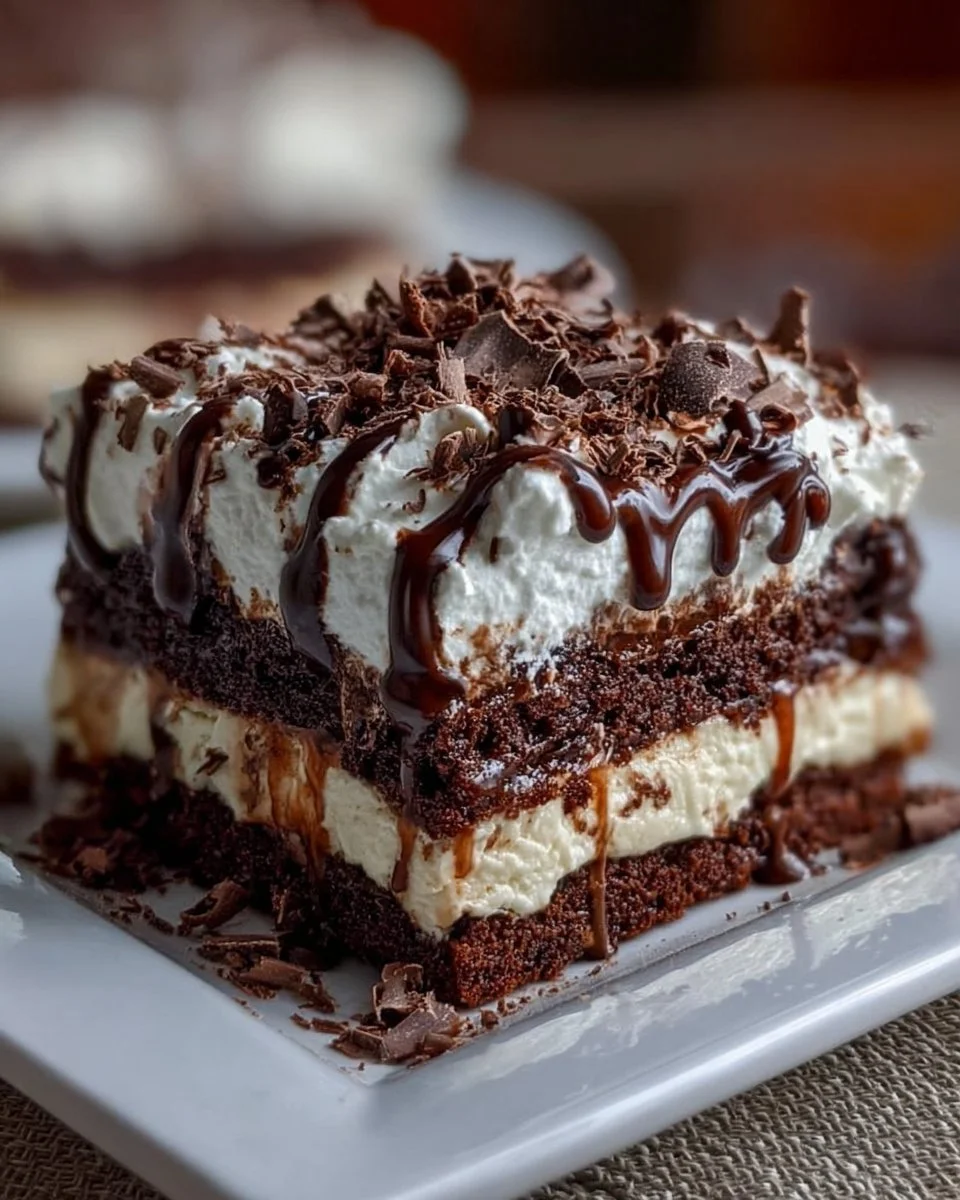
When a slice of dessert whispers sweet nothings to your taste buds, it can change the entire mood of your day. There is something simply magical about the combination of rich, chocolatey flavors coupled with a luscious creaminess that makes the Brownie Refrigerator Cake a standout choice. Imagine diving into a layered delight where each forkful unveils a symphony of textures: the fudgy, tender brownies yielding to a light and airy cream cheese mixture, topped with a drizzle of chocolate syrup that glistens like a promising sunset. This cake refreshingly marries the candor of a simple brownie with the sophistication of a layered dessert, making it perfect for any occasion.
Picture a gathering of loved ones, laughter filling the air as the aroma of cocoa wafts from the kitchen. As you serve slices of this incredible creation, the excitement is palpable. Each person sinks their fork into the cake, and with the first bite, they are effortlessly transported into a chocolate wonderland bursting with flavor. The richness of the cream cheese blends expertly with the modicum of sweetness from the powdered sugar, creating a heavenly layer that contrasts beautifully with the dense, moist brownie base. You can almost hear the sighs of satisfaction around the table.
Why You’ll Love This Brownie Refrigerator Cake
This irresistible Brownie Refrigerator Cake is about more than just satisfying your sweet tooth; it’s a celebration of flavor and texture in every bite. The brownie mix provides a fail-proof foundation that ensures each layer captures the heartiness of a classic brownie. Whipped cream and cream cheese contribute a lightness that’s crucial, bringing a perfect contrast to the dense chocolate with creaminess that dances on your tongue.
This cake shines in its versatility. Whether you’re hosting a birthday party, a family gathering, or simply indulging in a well-deserved treat after a long day, this cake fits seamlessly into any occasion. Cool and refreshing, it lifts your spirits on even the hottest summer days, while still providing warm comfort during the winter months. This cake’s striking layers, drizzled with chocolate syrup and possibly adorned with chocolate shavings, engage the eyes and beckon with promises of rich, sweet satisfaction.
Preparation Phase & Tools to Use
Creating this luscious masterpiece doesn’t require a host of specialized tools, making it accessible to bakers of all skill levels. Here are the essentials you’ll need:
-
Mixing Bowls: Two versatile bowls for combining your brownie mix and cream cheese filling. Choose bowls that are easy to clean and sturdy enough to withstand some mixing elbow grease.
-
Whisk or Electric Mixer: A whisk works well for the cream cheese mixture, but an electric mixer is ideal for achieving that perfect smoothness in under ten minutes.
-
Baking Dish: A suitable deep dish will allow ample space for layering your brownies and cream cheese filling. A glass dish showcases the layers beautifully.
-
Spatula: A silicone spatula acts as your partner in folding and spreading, ensuring the whipped cream gently integrates without losing its airy texture.
Preparation Tip: Having all your ingredients ready and at room temperature, especially your cream cheese, will streamline the process and yield a more harmonious filling.
Ingredients for Brownie Refrigerator Cake
To help you whip up this show-stopping dessert, here’s what you’ll need:
- 1 package of brownie mix
- 1/3 cup of vegetable oil
- 2 large eggs
- 1 cup of cream cheese, softened
- 1 cup of powdered sugar
- 2 cups of whipped cream
- Chocolate syrup for drizzling
- Chocolate shavings for garnish (optional)
Each ingredient plays a pivotal role. The brownie mix serves as a reliable base, while vegetable oil ensures a moist texture. The cream cheese offers a rich, tangy balance, perfectly complemented by the sweetness of the powdered sugar. And let’s not forget the whipped cream, which brings a light fluffiness that will make your cake stand out! If you’d like to experiment, try using a homemade brownie recipe or a different sweetener for the cream cheese mixture.
How to Make Brownie Refrigerator Cake
-
Prepare the brownie mix according to the package instructions, blending the mix with vegetable oil and eggs. Bake in a preheated oven and allow the brownies to cool completely before diving into the assembly.
-
In a mixing bowl, beat the softened cream cheese until it radiates smoothness. Gradually add the powdered sugar to ensure that it mixes evenly without lumps; this step is crucial for a satisfying texture.
-
Gently fold in the whipped cream until fully incorporated—take your time here! The lighter the fold, the fluffier your mixture will be.
-
Cut the cooled brownies into square pieces and layer them in your prepared dish. Start with a layer that covers the bottom completely.
-
Gently spread the cream cheese mixture over the brownie layer with a spatula. The creaminess should spread effortlessly, creating a smooth layer over the brownies.
-
Repeat the layering process with the remaining brownies and cream cheese mixture until you’ve used all your ingredients. Aim for two to three layers for a stunning presentation.
-
Cover the dish with plastic wrap and refrigerate for at least four hours or, for better results, overnight. This step allows the flavors to meld beautifully.
-
Before serving, drizzle generously with chocolate syrup and sprinkle with chocolate shavings if you’re feeling fancy.
Tip: Make sure to use chilled utensils when mixing the cream cheese to keep it from becoming too warm, which can affect the texture.
Chef’s Notes & Helpful Tips
-
Make-ahead tips: Prepare this dish a day in advance. Having it chilled and ready to serve guarantees a refreshing treat during a busy dinner party.
-
Cooking alternatives: If your oven is out of commission, try baking the brownies in an air fryer. Just adjust the time and temperature slightly, keeping an eye on the brownies to ensure that they fully set.
-
Customization ideas: Personalize your cake by adding layers of fruit, crushed cookies, or nuts between the layers. Each addition adds a unique texture and flavor that will delight your family and friends.
Common Mistakes to Avoid
-
Overmixing the brownie batter can lead to tough brownies. Mix just until combined for a chewy texture.
-
Not letting the brownies cool completely before layering can cause the filling to melt and become runny. Patience really pays off!
-
Skipping the refrigeration step will compromise the structural integrity of your cake. The layers need time to meld and set, allowing for easier slicing!
What to Serve With Brownie Refrigerator Cake
Pair this delightful cake with some options to elevate your dessert experience:
-
Vanilla ice cream: The creamy coldness beautifully balances the decadent brownie layers.
-
Fresh berries: A sprinkle of strawberries or raspberries adds a refreshing tartness that cuts through the richness.
-
Chocolate sauce: A side of warm chocolate sauce allows ice cream lovers to indulge even more.
-
Espresso: The bold coffee flavors complement the chocolate beautifully, creating a sophisticated pairing.
-
Mint leaves: Garnishing your plates with mint not only adds a pop of color but also a refreshing taste contrast.
-
Whipped cream: For those who can never have enough cream, a dollop on the side is always heavenly.
Storage & Reheating Instructions
To maintain the luscious goodness of your Brownie Refrigerator Cake, store it in the fridge, tightly covered, for up to five days. If you wish to keep it longer, it freezes beautifully. Just make sure to wrap it well in plastic wrap and aluminum foil. To enjoy, allow it to thaw in the refrigerator overnight before serving. Reheating is not recommended, as it alters the texture of the cake.
Estimated Nutrition Information
Per serving (based on 12 servings):
- Calories: 290
- Protein: 4g
- Carbs: 35g
- Fat: 15g
Note: Nutrition values are estimates and can vary based on specific ingredients and portion sizes.
FAQs
1. Can I use homemade brownies?
Absolutely! Homemade brownies can elevate the cake’s flavor. Just ensure they cool completely before layering.
2. How can I make this recipe gluten-free?
Opt for a gluten-free brownie mix that meets your dietary needs. The rest of the ingredients are naturally gluten-free.
3. Can I replace cream cheese with something else?
Mascarpone cheese or Greek yogurt can be delicious alternatives if you’re seeking a different flavor profile or a lighter option.
4. How do I cut neat slices?
Using a warm knife helps create cleaner cuts. Dip the knife in hot water, wipe it clean, and slice through the layers.
5. How long will this dessert last in the fridge?
The Brownie Refrigerator Cake maintains its charm for about five days in the fridge, allowing for a few days of deliciousness.
Conclusion
This Brownie Refrigerator Cake brings together everything we love about sweets—chocolate, cream, and layers of happiness. It’s more than just a dessert; it’s an experience filled with warmth and nostalgia, perfect for bringing friends and family together. With each slice, you deliver warmth and joy, enticing everyone to savor every moment. So why wait? Dive into making this delectable treat today, and let the indulgence unfold!
Print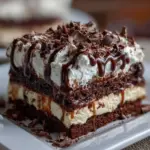
Brownie Refrigerator Cake
- Prep Time: 15 minutes
- Cook Time: 30 minutes
- Total Time: 75 minutes
- Yield: 12 servings 1x
- Category: Dessert
- Method: Refrigeration
- Cuisine: American
- Diet: Vegetarian
Description
A luscious layered cake combining rich brownies and creamy filling, perfect for any occasion.
Ingredients
- 1 package of brownie mix
- 1/3 cup of vegetable oil
- 2 large eggs
- 1 cup of cream cheese, softened
- 1 cup of powdered sugar
- 2 cups of whipped cream
- Chocolate syrup for drizzling
- Chocolate shavings for garnish (optional)
Instructions
- Prepare the brownie mix according to the package instructions, blending the mix with vegetable oil and eggs. Bake in a preheated oven and allow the brownies to cool completely before diving into the assembly.
- In a mixing bowl, beat the softened cream cheese until it radiates smoothness. Gradually add the powdered sugar to ensure that it mixes evenly without lumps; this step is crucial for a satisfying texture.
- Gently fold in the whipped cream until fully incorporated—take your time here! The lighter the fold, the fluffier your mixture will be.
- Cut the cooled brownies into square pieces and layer them in your prepared dish. Start with a layer that covers the bottom completely.
- Gently spread the cream cheese mixture over the brownie layer with a spatula. The creaminess should spread effortlessly, creating a smooth layer over the brownies.
- Repeat the layering process with the remaining brownies and cream cheese mixture until you’ve used all your ingredients. Aim for two to three layers for a stunning presentation.
- Cover the dish with plastic wrap and refrigerate for at least four hours or, for better results, overnight. This step allows the flavors to meld beautifully.
- Before serving, drizzle generously with chocolate syrup and sprinkle with chocolate shavings if you’re feeling fancy.
Notes
Make-ahead tips: Prepare this dish a day in advance. Use chilled utensils when mixing to keep the cream cheese from becoming too warm.
Nutrition
- Serving Size: 1 slice
- Calories: 290
- Sugar: 20g
- Sodium: 200mg
- Fat: 15g
- Saturated Fat: 9g
- Unsaturated Fat: 6g
- Trans Fat: 0g
- Carbohydrates: 35g
- Fiber: 1g
- Protein: 4g
- Cholesterol: 30mg